Load Balancers
Create Loadbalancer
Left on the left hand side of Consumer Console Load Balancers to menu.
Click Create button.

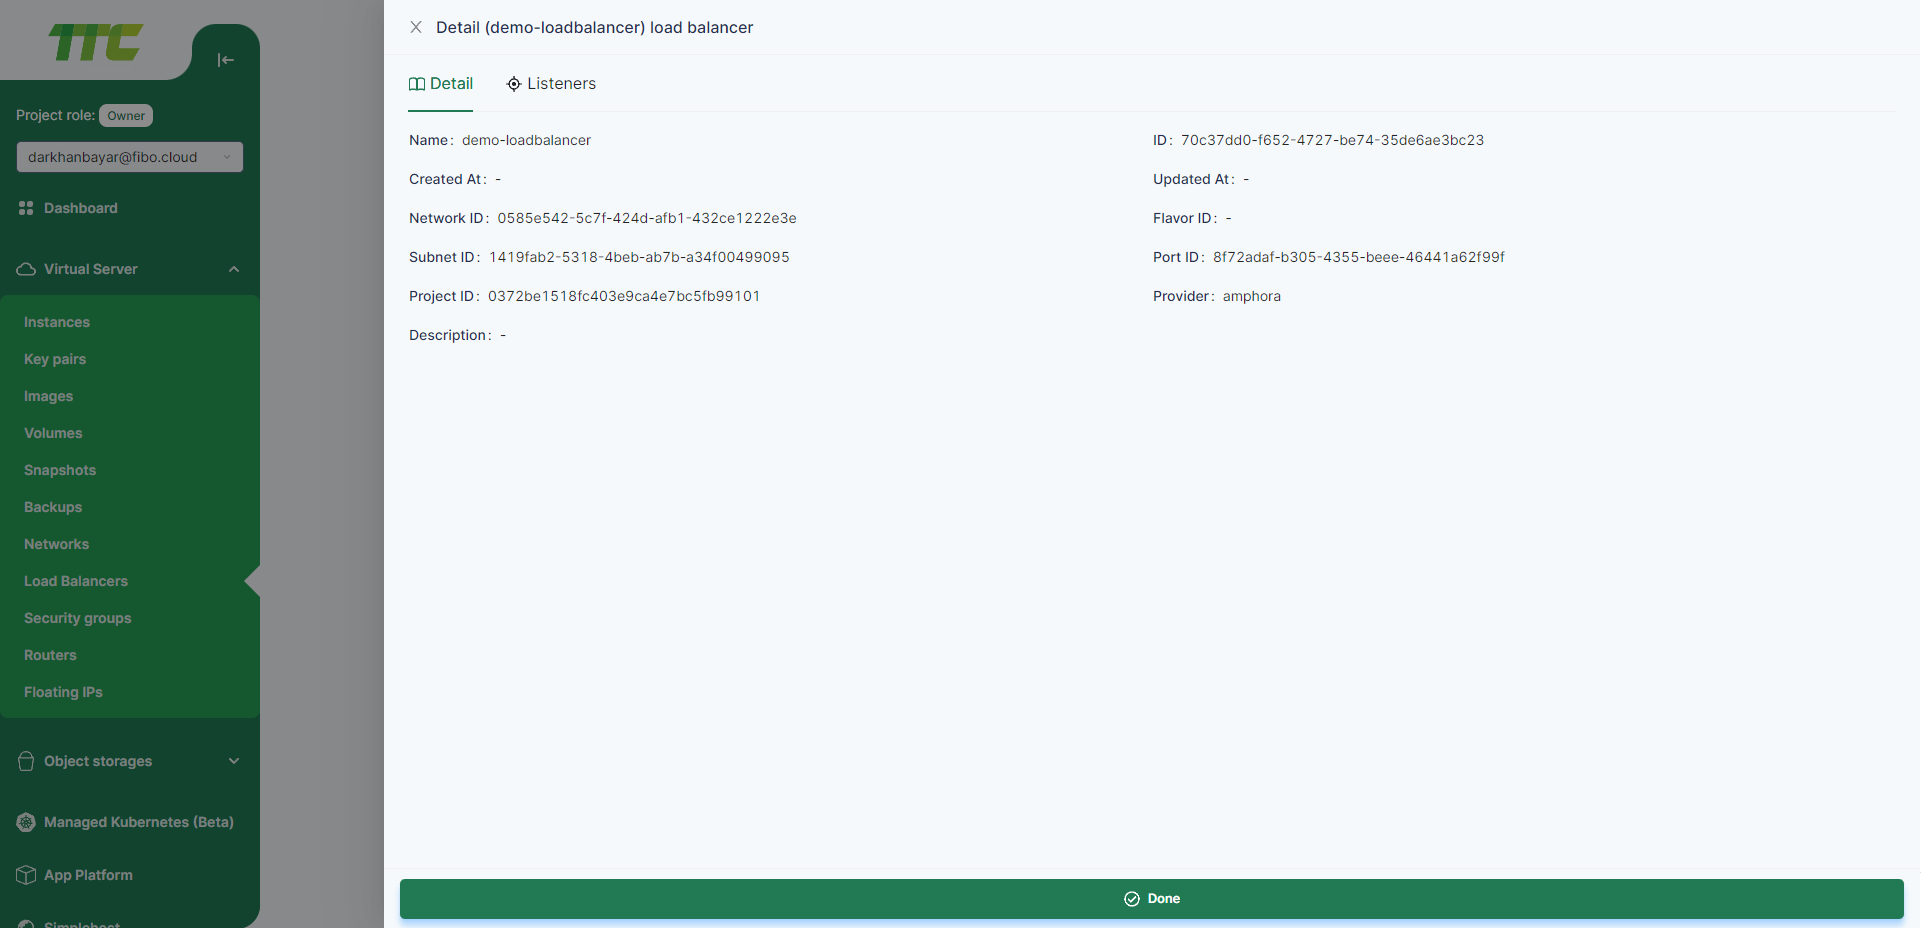
Load balancer details
- A new dialog box for creating Load Balancer will appear, and the following fields are required to create a new Loadbalancer.
- Name: The name of the Loadbalancer
- Network ID: The network where the balancer will be located.
- Subnet ID: the subnet where the balancer will be located.
Information
The balancer will distribute incoming traffic to the selected services located in this subnet.

Listener details
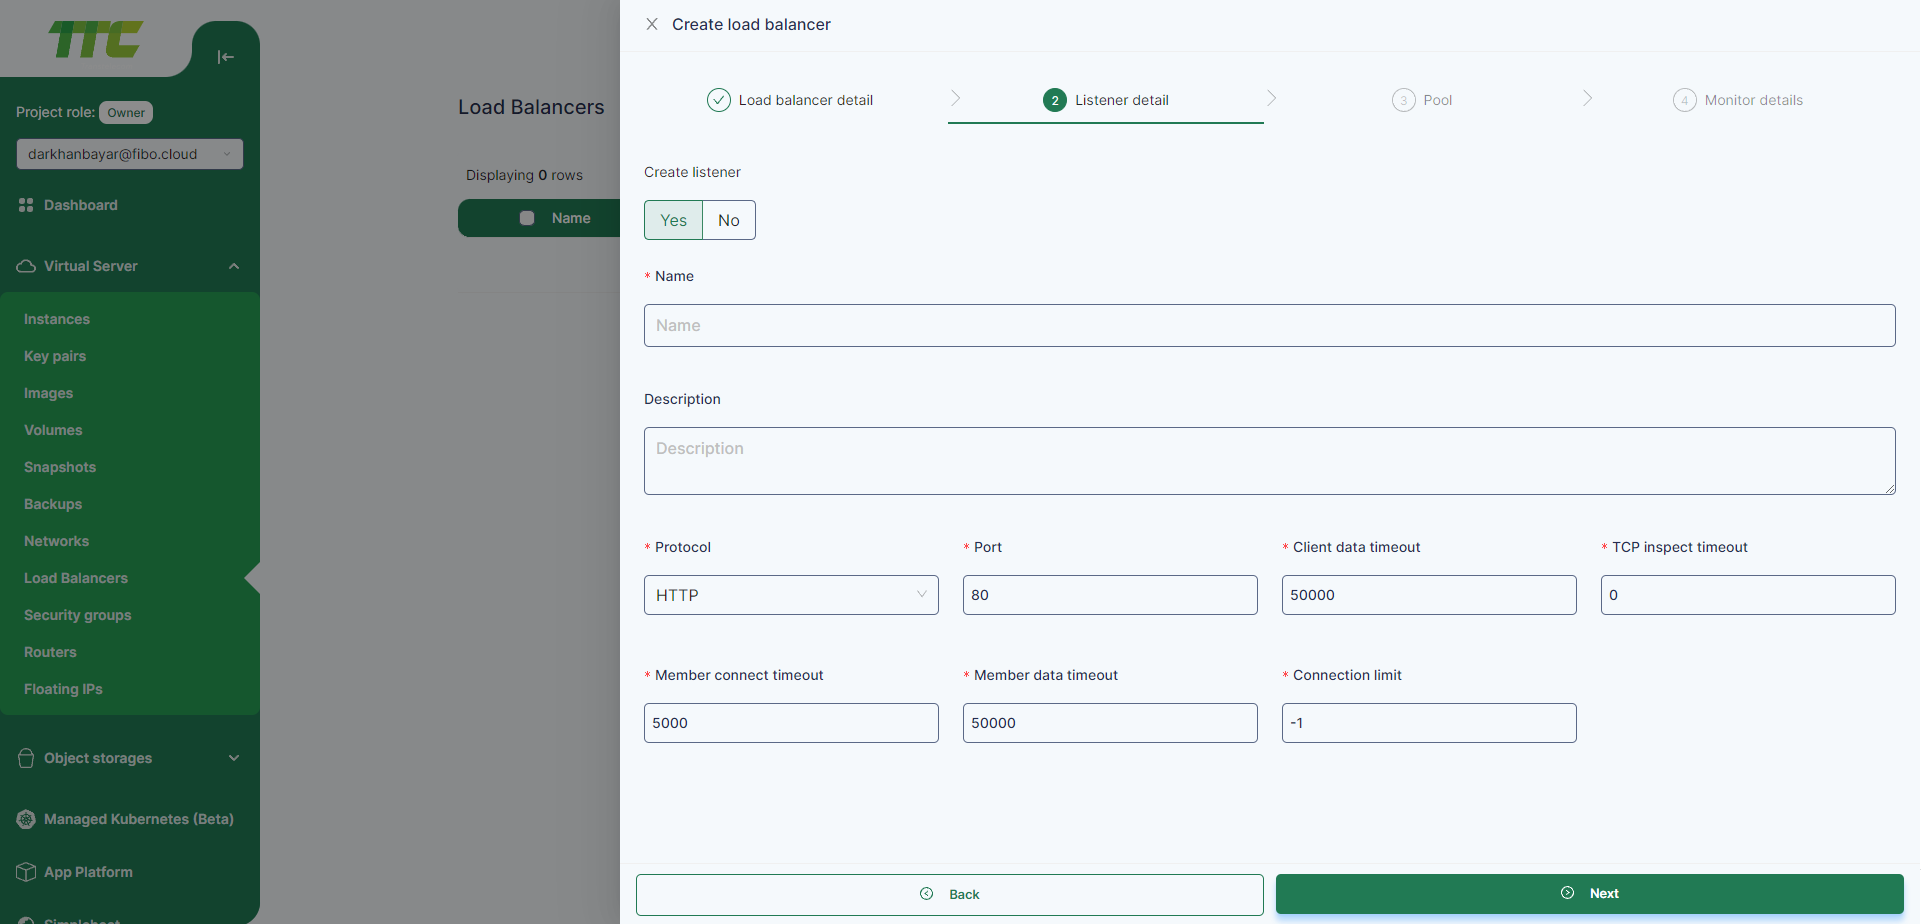
- When creating an Loadbalancer, choose whether to create it with a listener. If you want to create without listeners, select No and click Next.
- The following fields are required be filled in to create a Listener. Fill in the following fields and click Next
- Name: The name of the Listener
- Protocol: The balancing protocol to be used by the balancer.
- Port: The balancing port to be used by the balancer.
- Client data timeout: client inactivity timeout.
- TCP data timeout: tcp inactivity timeout.
- Member connect timeout: backend connection timeout.
- Member data timeout: backend inactive timeout.
- Connection limit:
Information
The timeout values are set in milliseconds. The minimum value is 0, the maximum value is 2073600000 (576 hours).
Pool
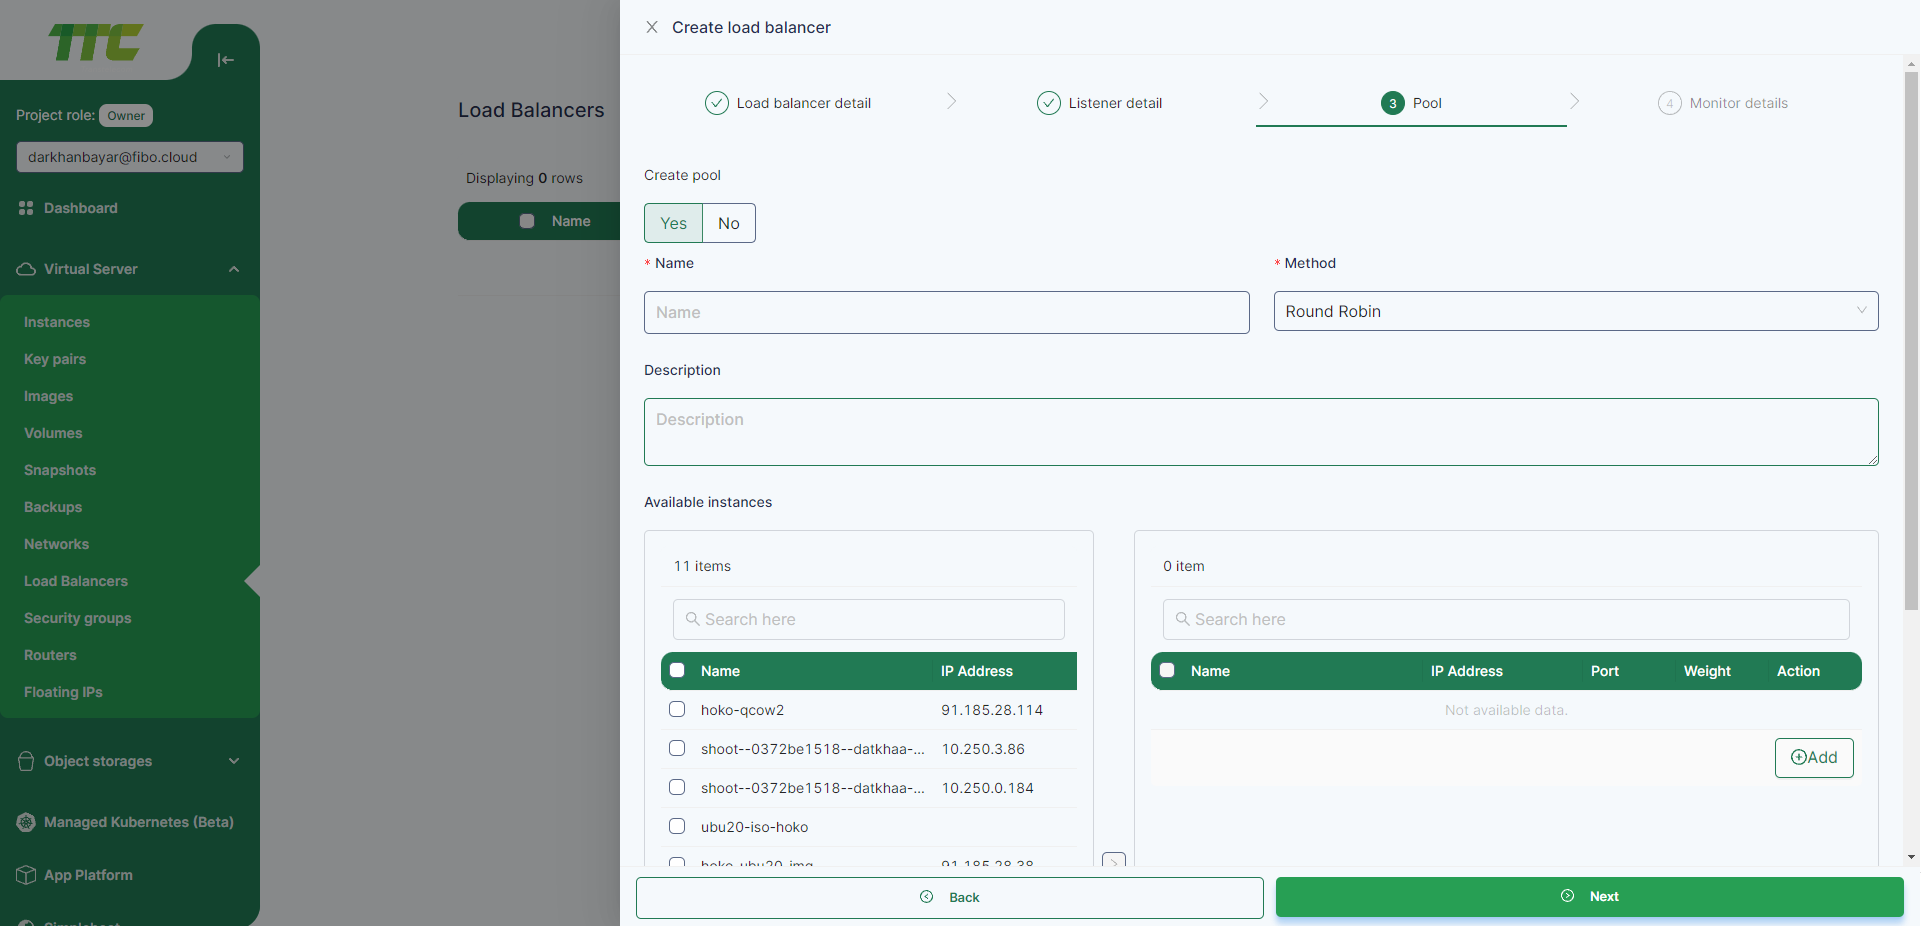
- When creating an Loadbalancer, choose whether to create it with a pool. If you want to create without pools, select No and click Next.
- The following fields are required be filled in to create a Pool.
- Name: The name of the Pool
- Method: The balancing method to be used by the balancer.
- LEAST_CONNECTIONS: use the backend to which the least number of connections are established.
- ROUND_ROBIN: go through all backends one by one.
- SOURCE_IP: assign a backend for handling traffic to a specific client IP address.
- Select the instances belonging to the pool and fill in the following fields and click Next
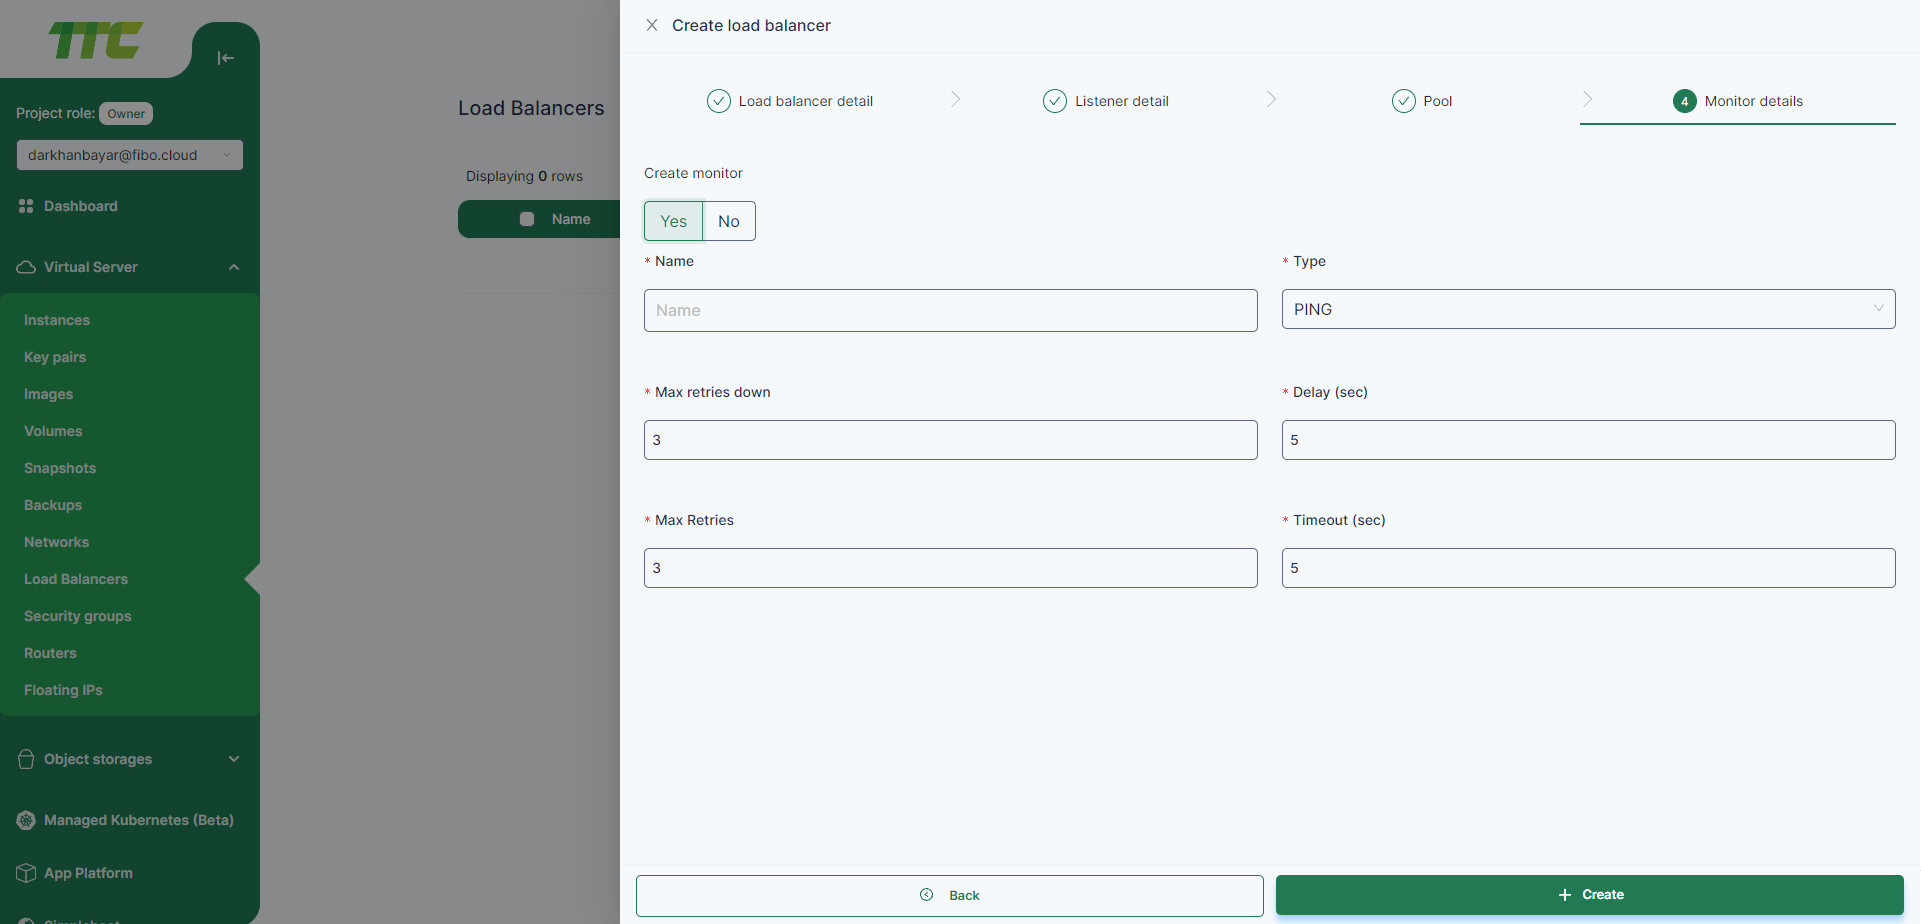
Monitor details
- When creating an Loadbalancer, choose whether to create it with a Monitor. If you want to create without monitor, select No and click Create.
- The following fields are required be filled in to create a Monitor. Fill in the following fields and click Create
- Name: The name of the Monitor
- Type: TCP, HTTP, HTTPS, or PING
- Max retries down: The number of times to try before the backend is deemed inaccessible.
- Delay(sec): Time between retries.
- Max retries: The number of times to try.
- Timeout(sec): Time to complete the attempt.
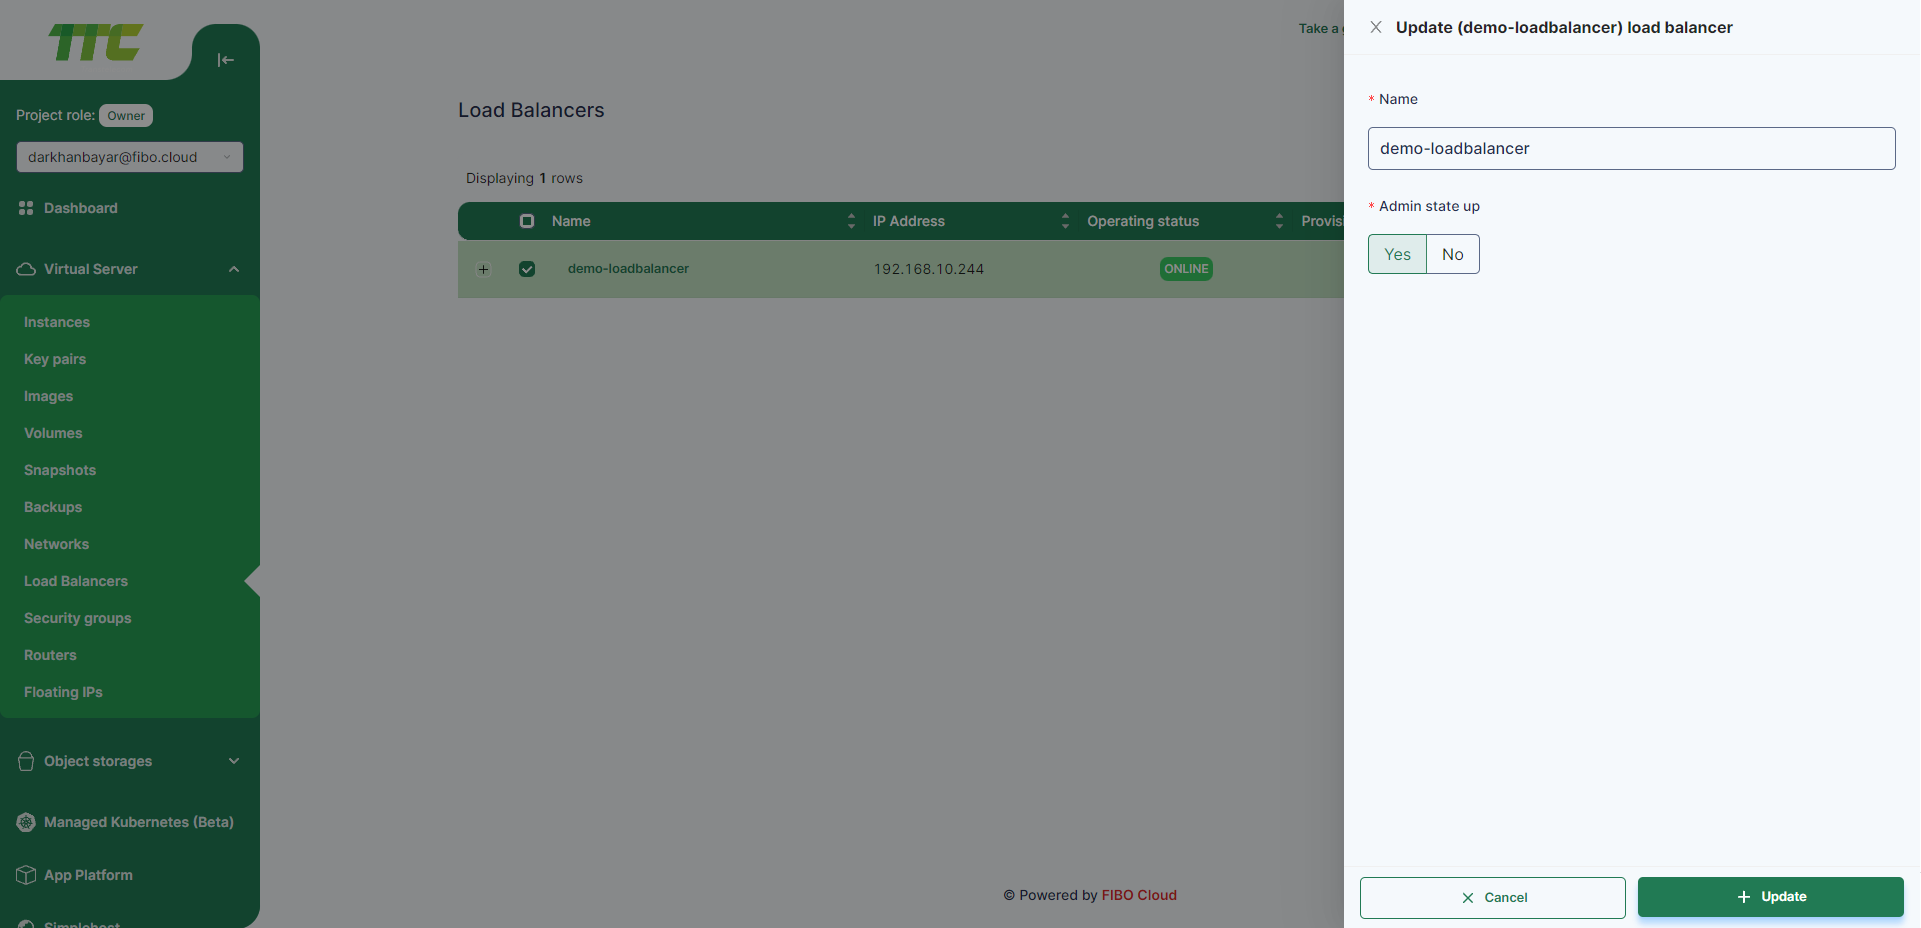
Edit Loadbalancer
- When editing a loadbalancer, first select the Loadbalancer and click Action button, select the Edit button.
- Change the name of Loadbalancer, or change admin state then Update button
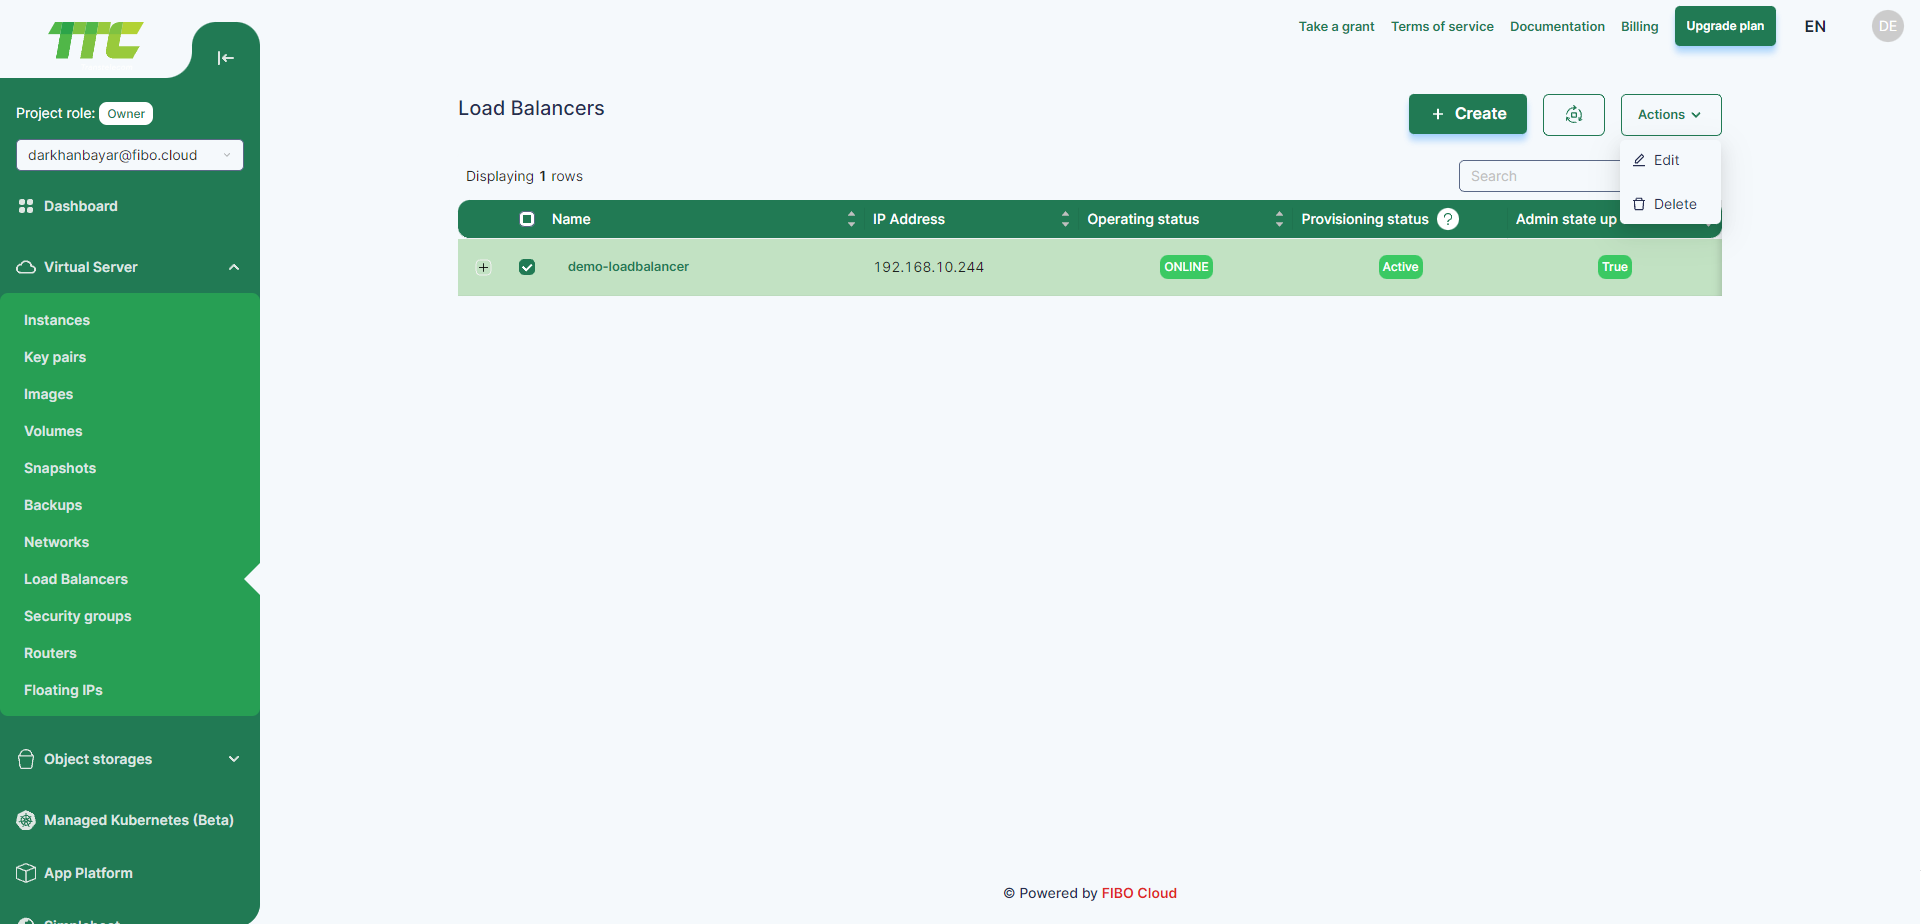
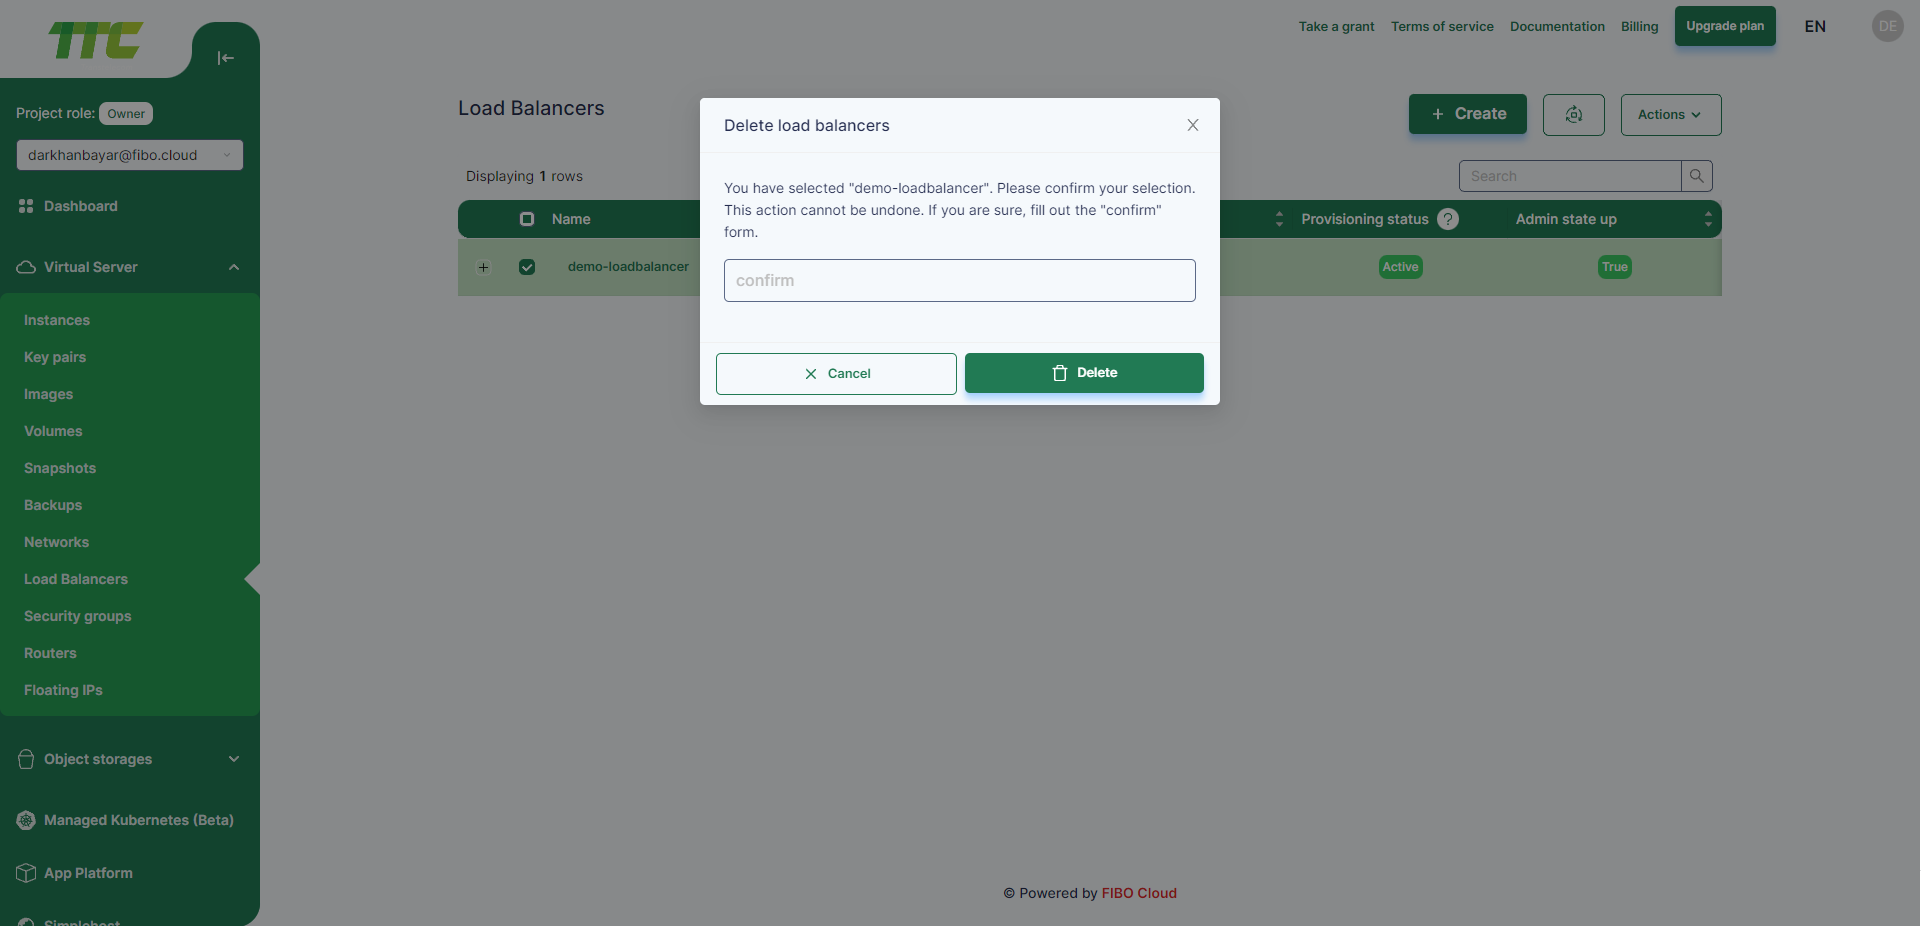
Delete Loadbalancer
- When deleting a loadbalancer, first select the Loadbalancer and click Action button, select the Delete button.
- The following window for deleting Loadbalancer will open, click the Delete button and the deletion will be successful.
Listener
Create Listener
- Click on the Load Balancer name.
- Select the Listeners tab.
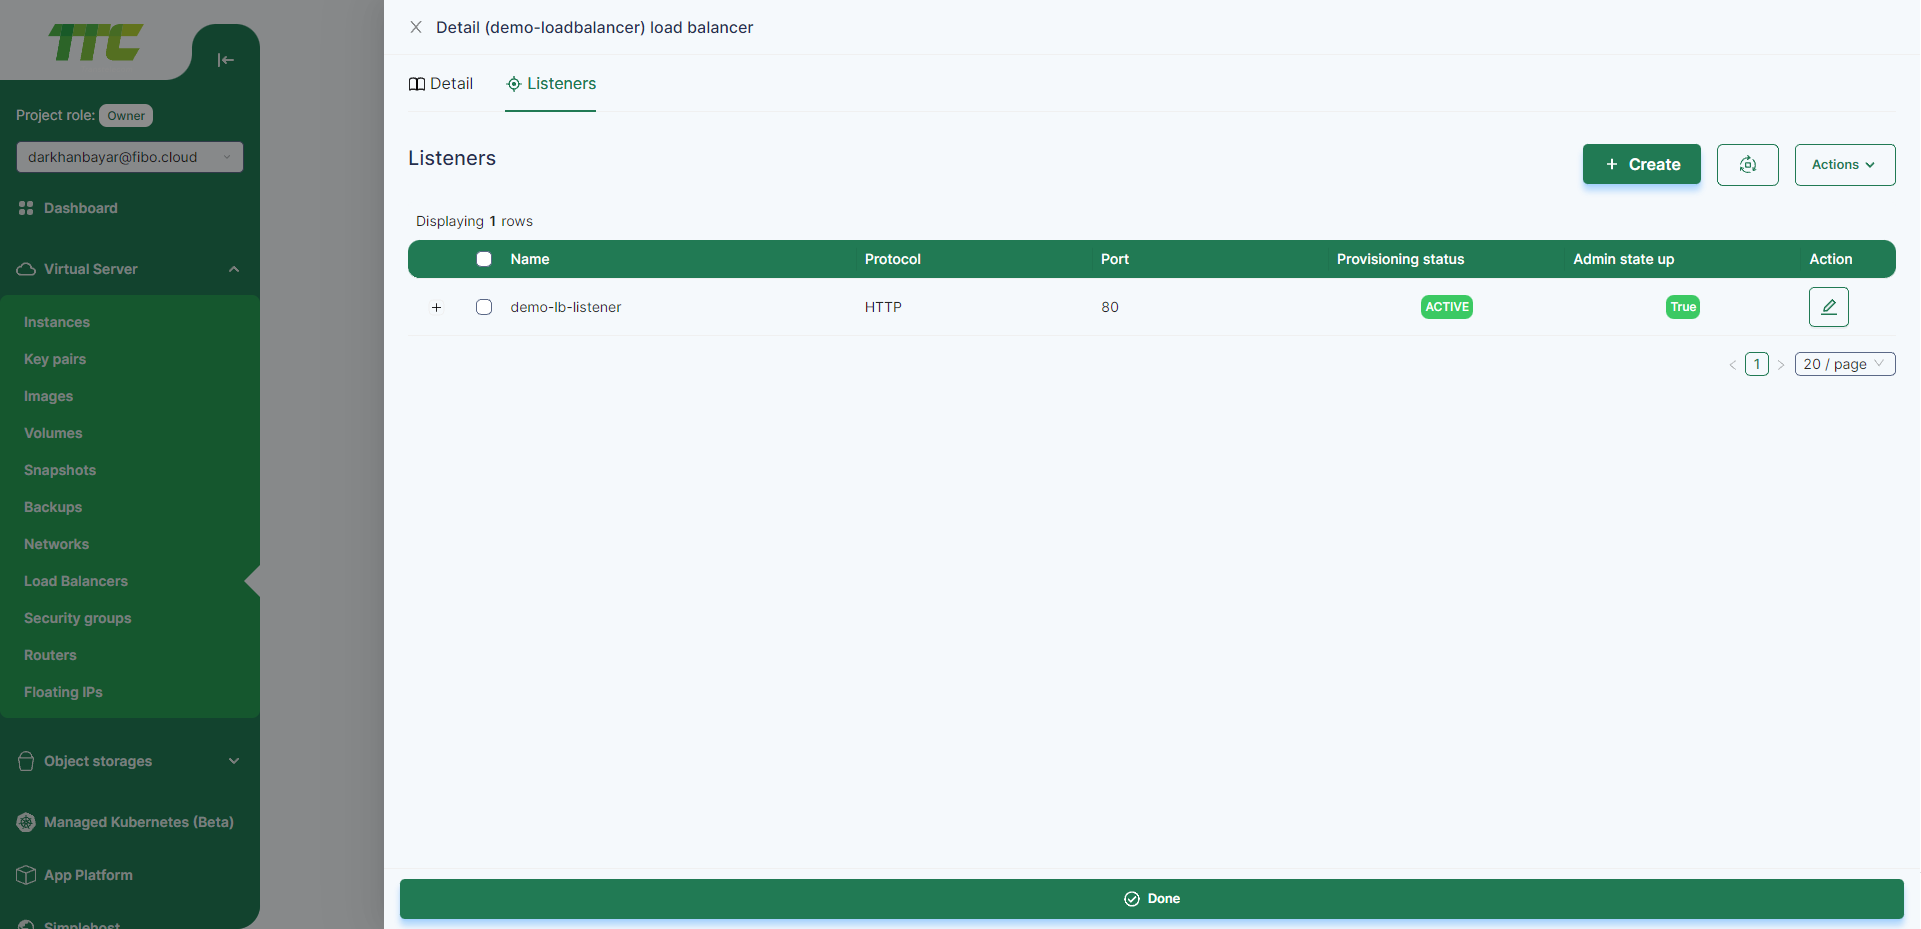
- Click Create button.
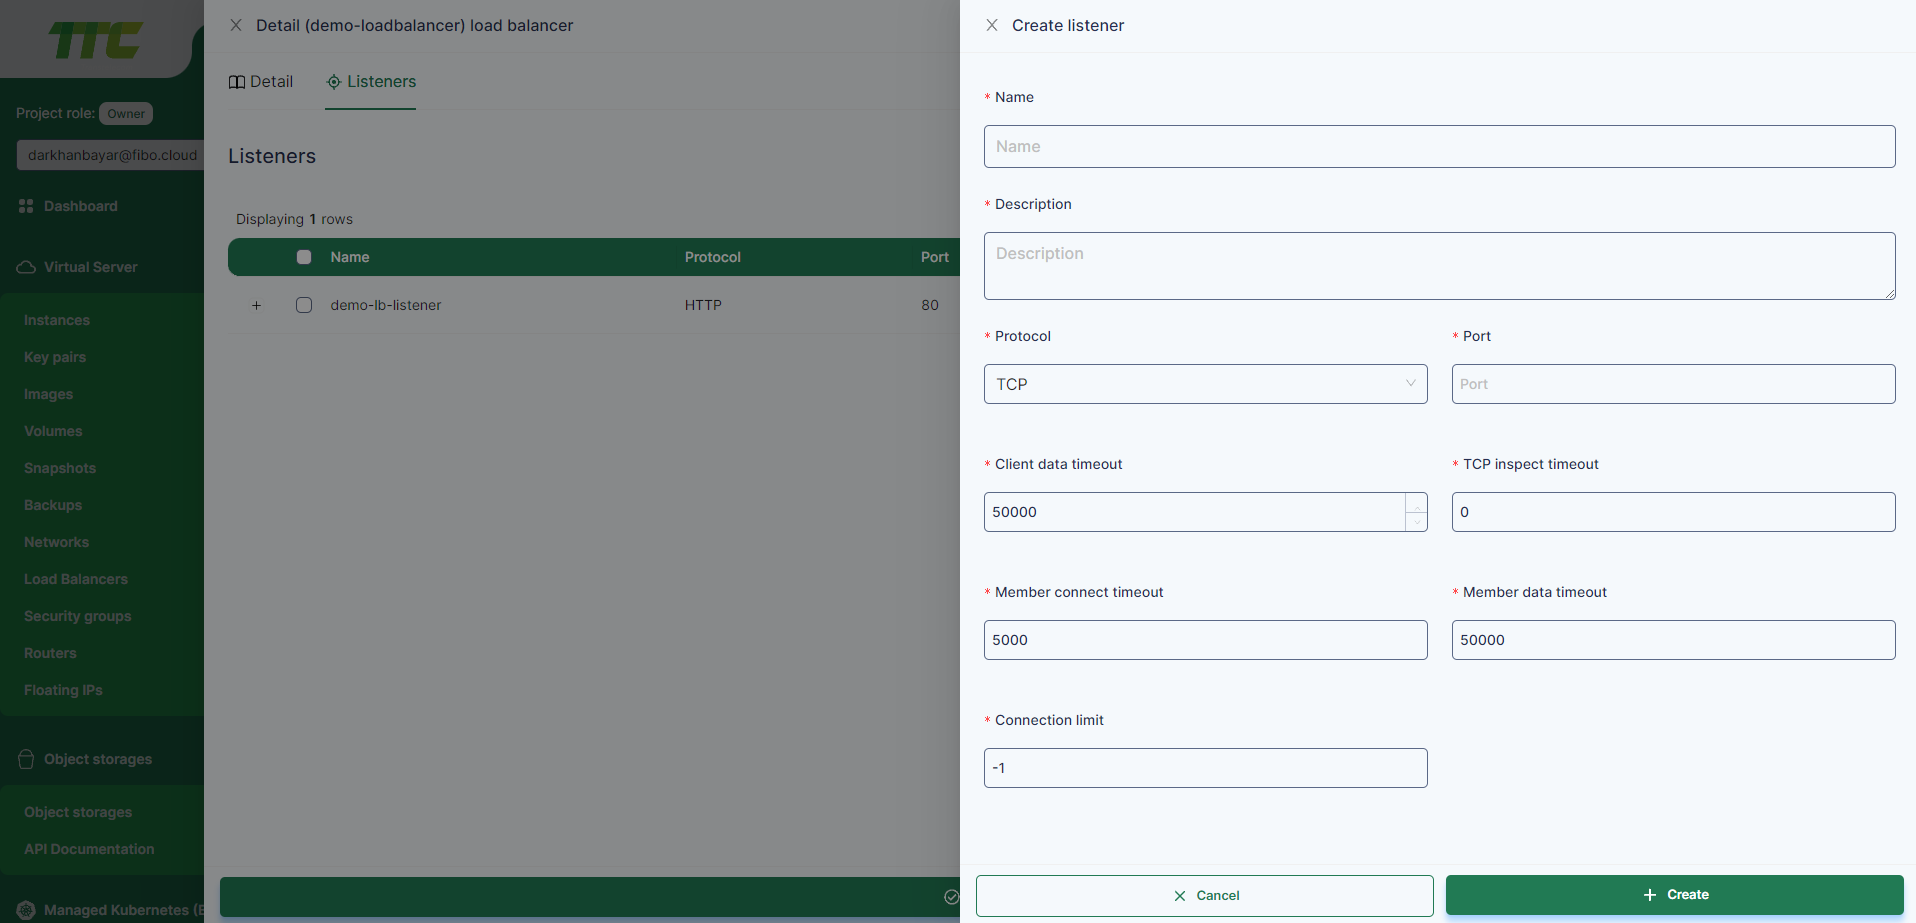
- The following fields are required be filled in to create a Listener. Fill in the following fields and click Create
- Name: The name of the Listener
- Protocol: The balancing protocol to be used by the balancer.
- Port: The balancing port to be used by the balancer.
- Client data timeout: client inactivity timeout.
- TCP data timeout:
- Member connect timeout: backend connection timeout.
- Member data timeout: backend inactive timeout.
- Connection limit:
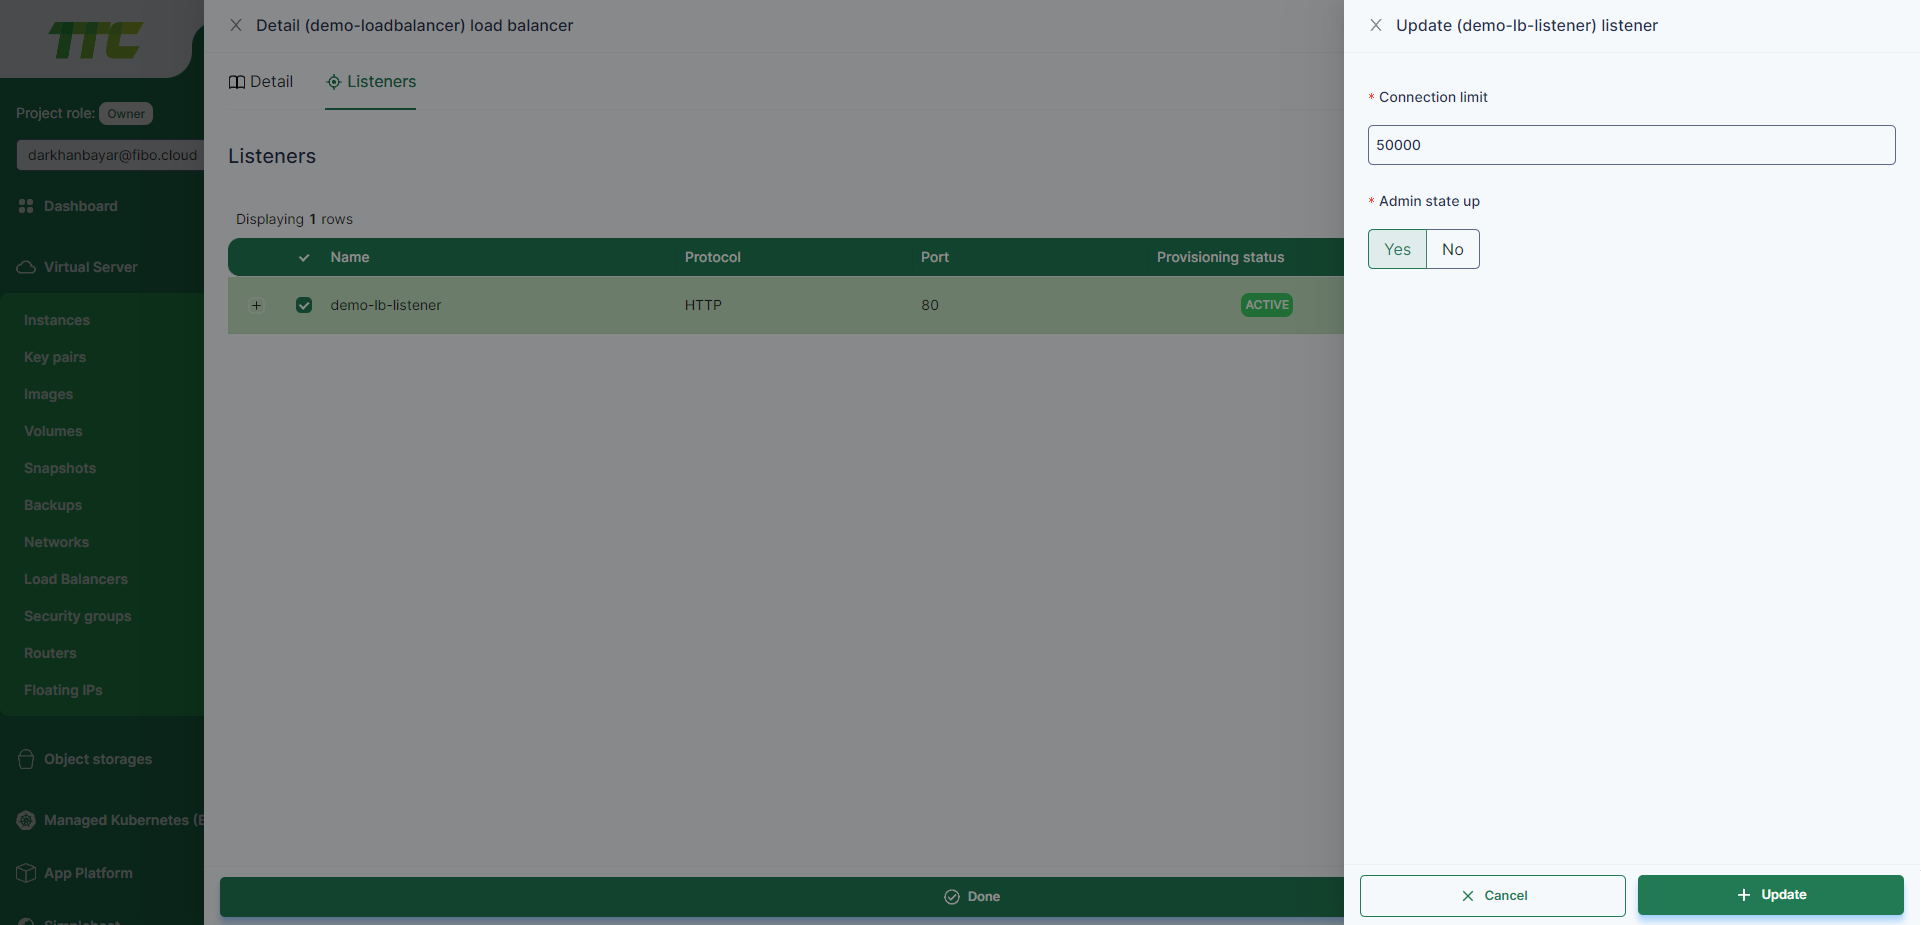
Update Listener
- To edit a Listener, first select the Listener and click the Pencil button in the Actions column
- Change the connection limit, or change admin state then Update button
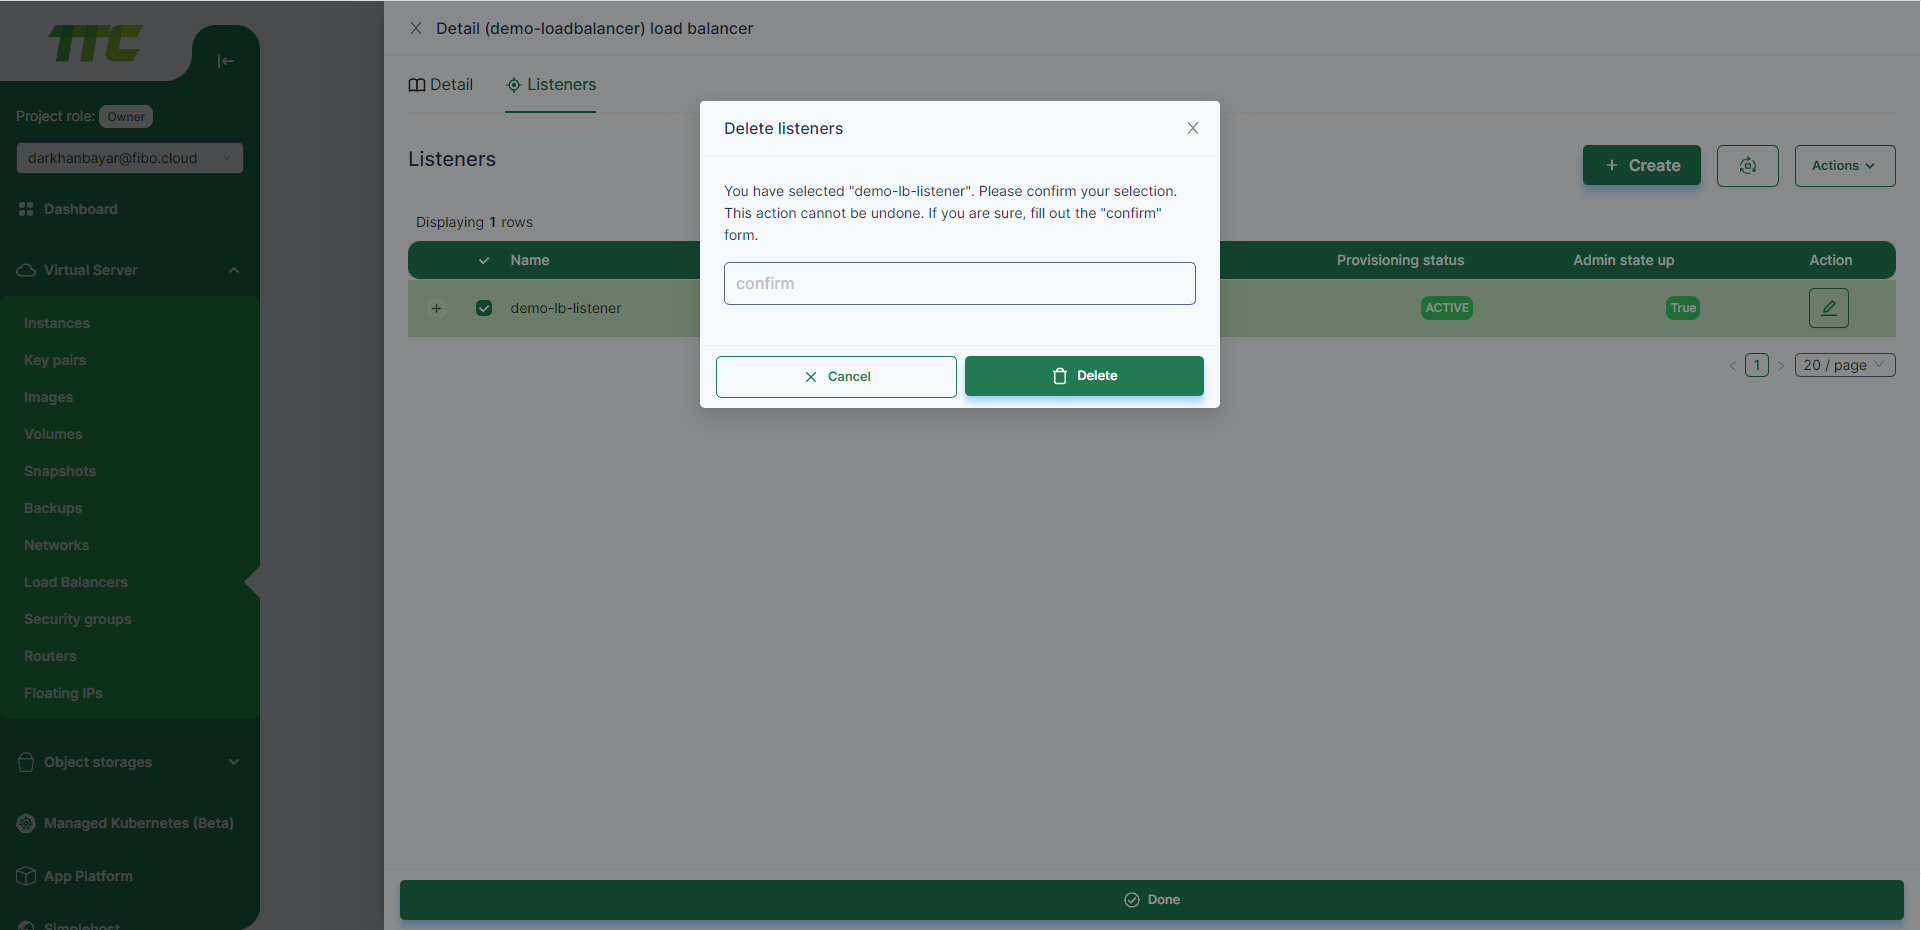
Delete Listener
- When deleting a listener, first select the Listener and click Action button, select the Delete button.
- The following window for deleting Listener will open, click the Delete button and the deletion will be successful.
How to connect an external IP address on a loadbalancer created with a private network?
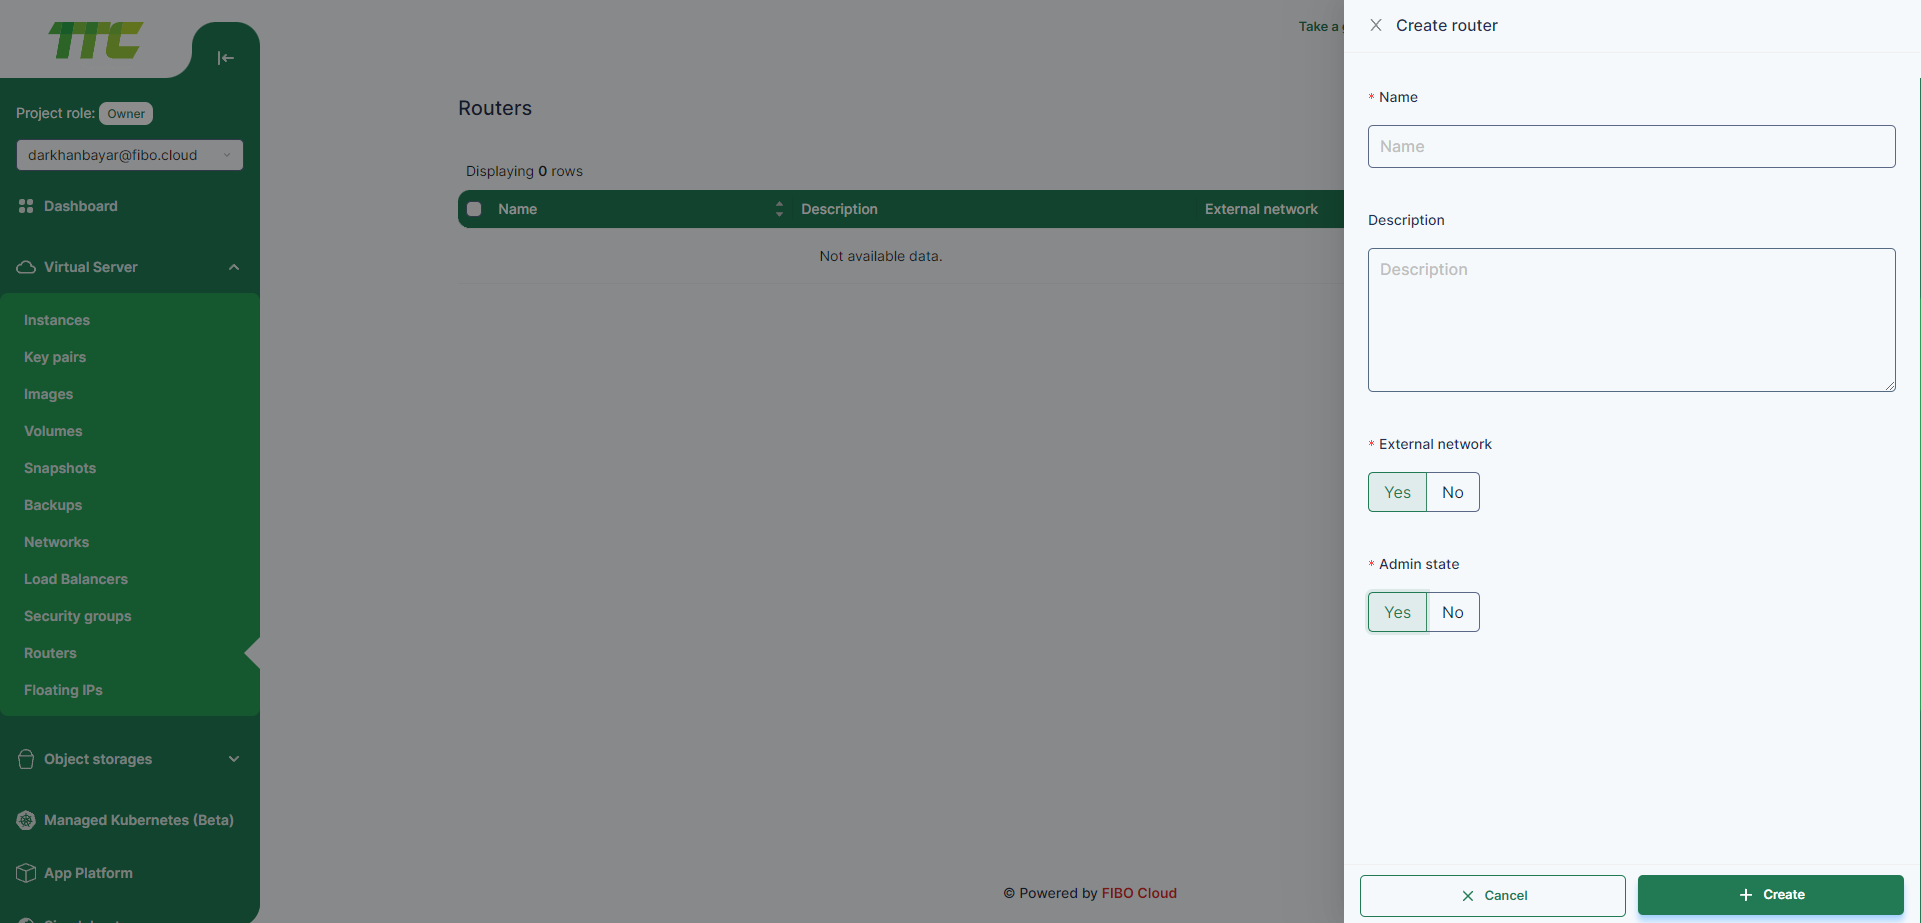
In order to connect the external address of the created loadbalancer to the private network, it is necessary to first create a router and configure the interface.
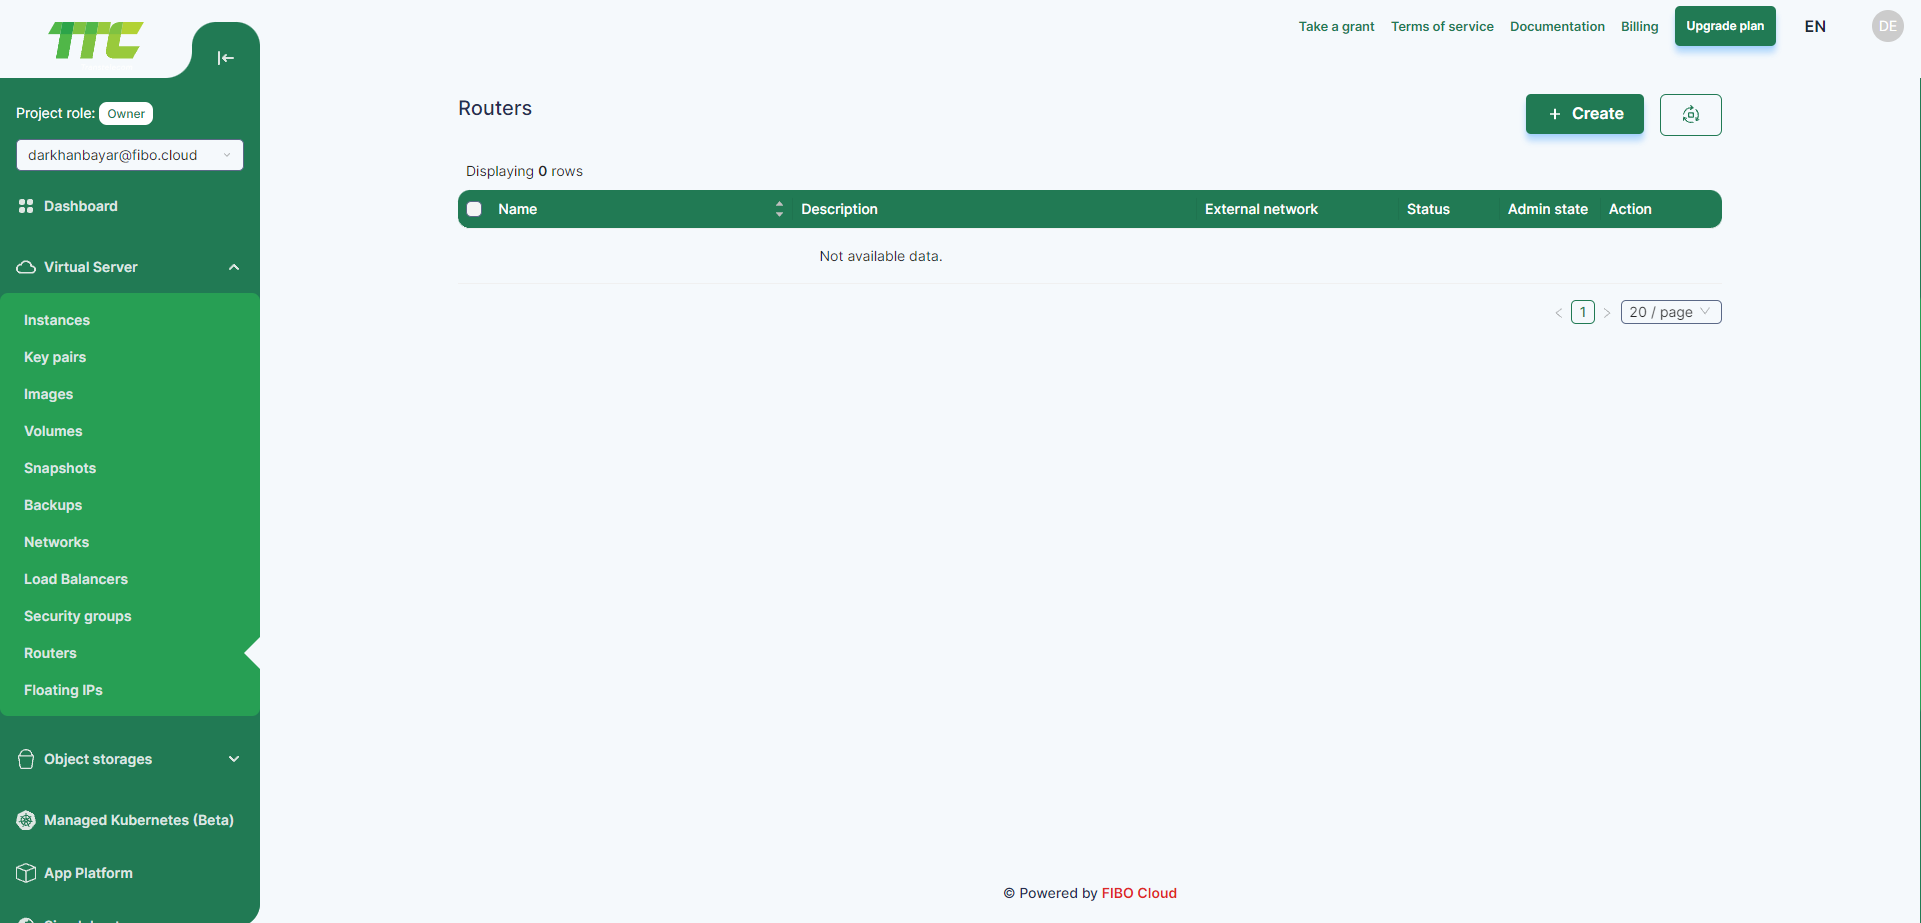
- Left on the left hand side of Consumer Console Router to menu.
- When creating the router, set its external network and admin state to Yes.
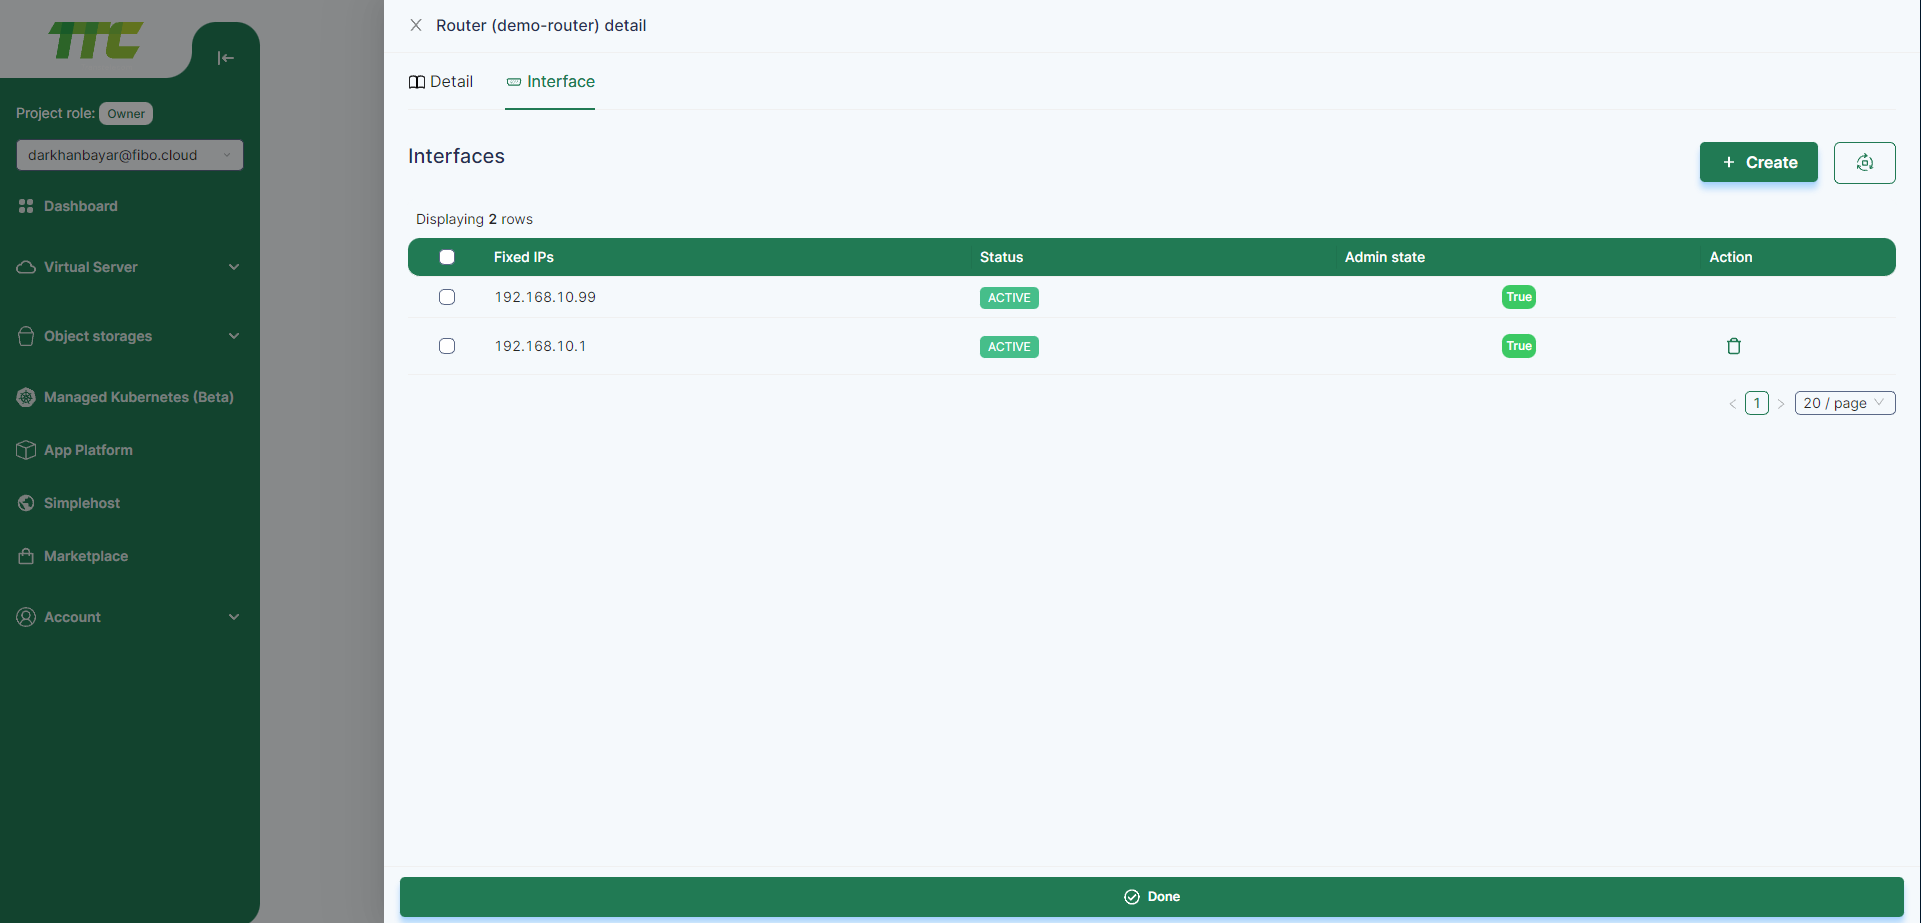
- On the created router, configure the private network used by the loadbalancer as an interface on the router.
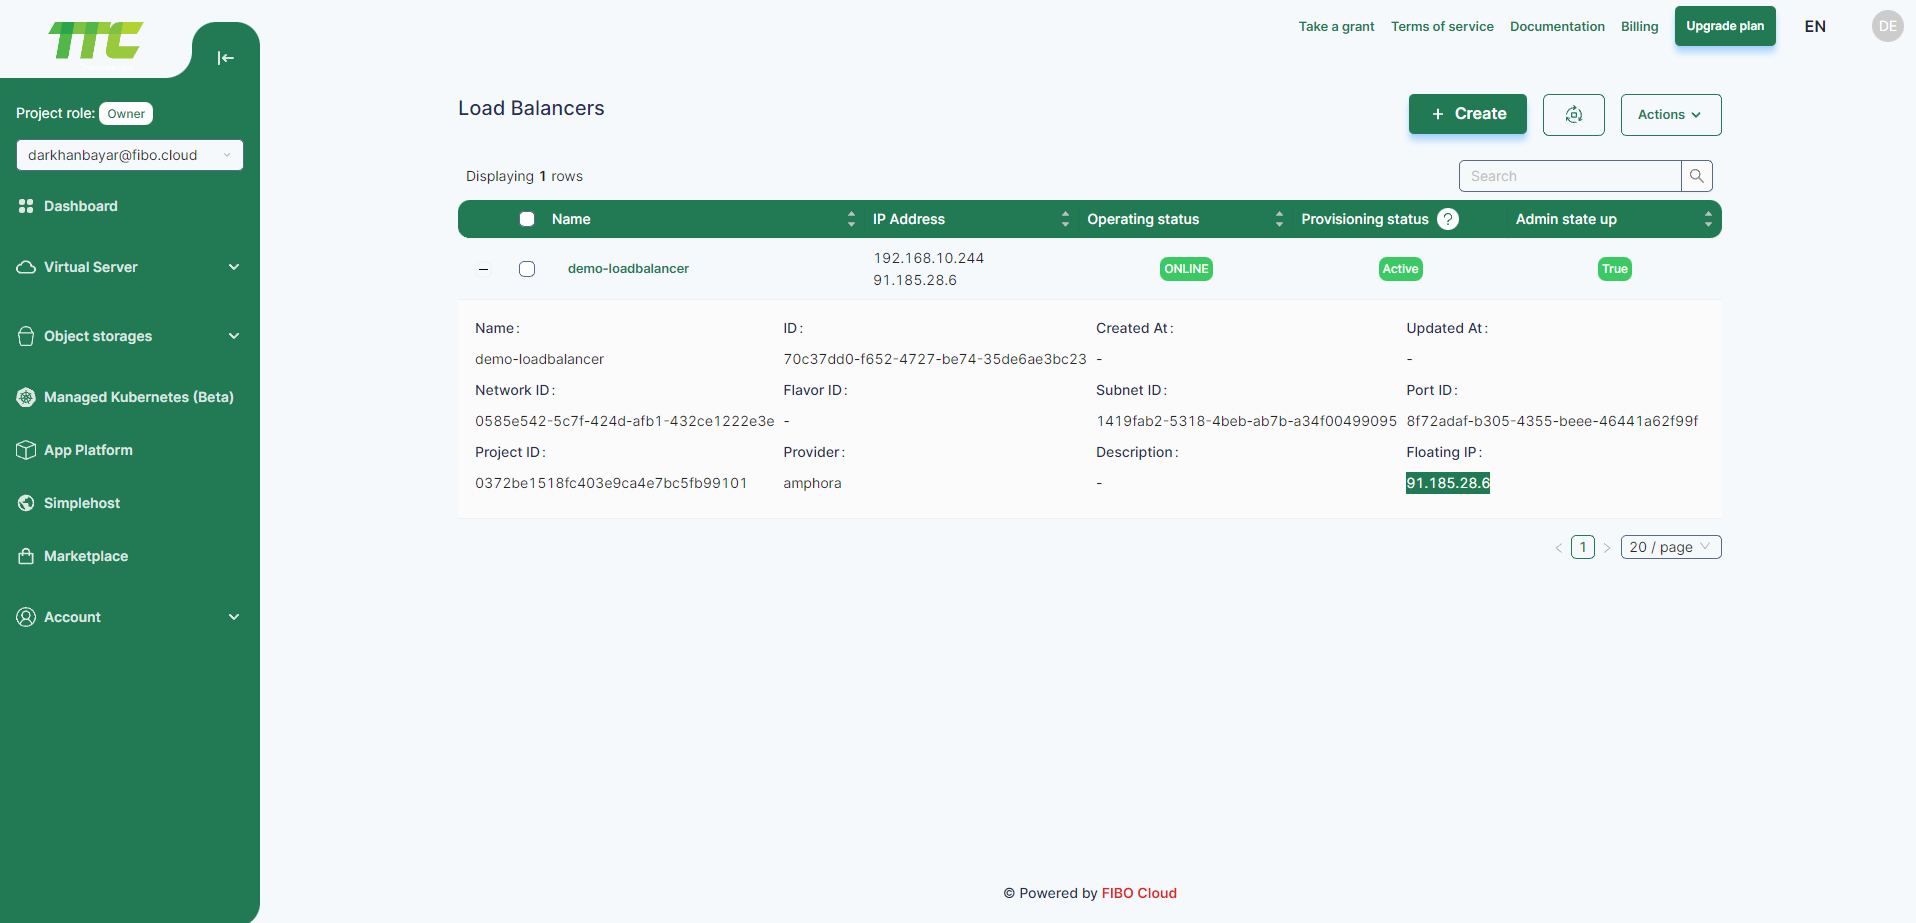
- After that, a Floating IP address is created and connected to the loadbalancer. This way your balancer will have a external address.
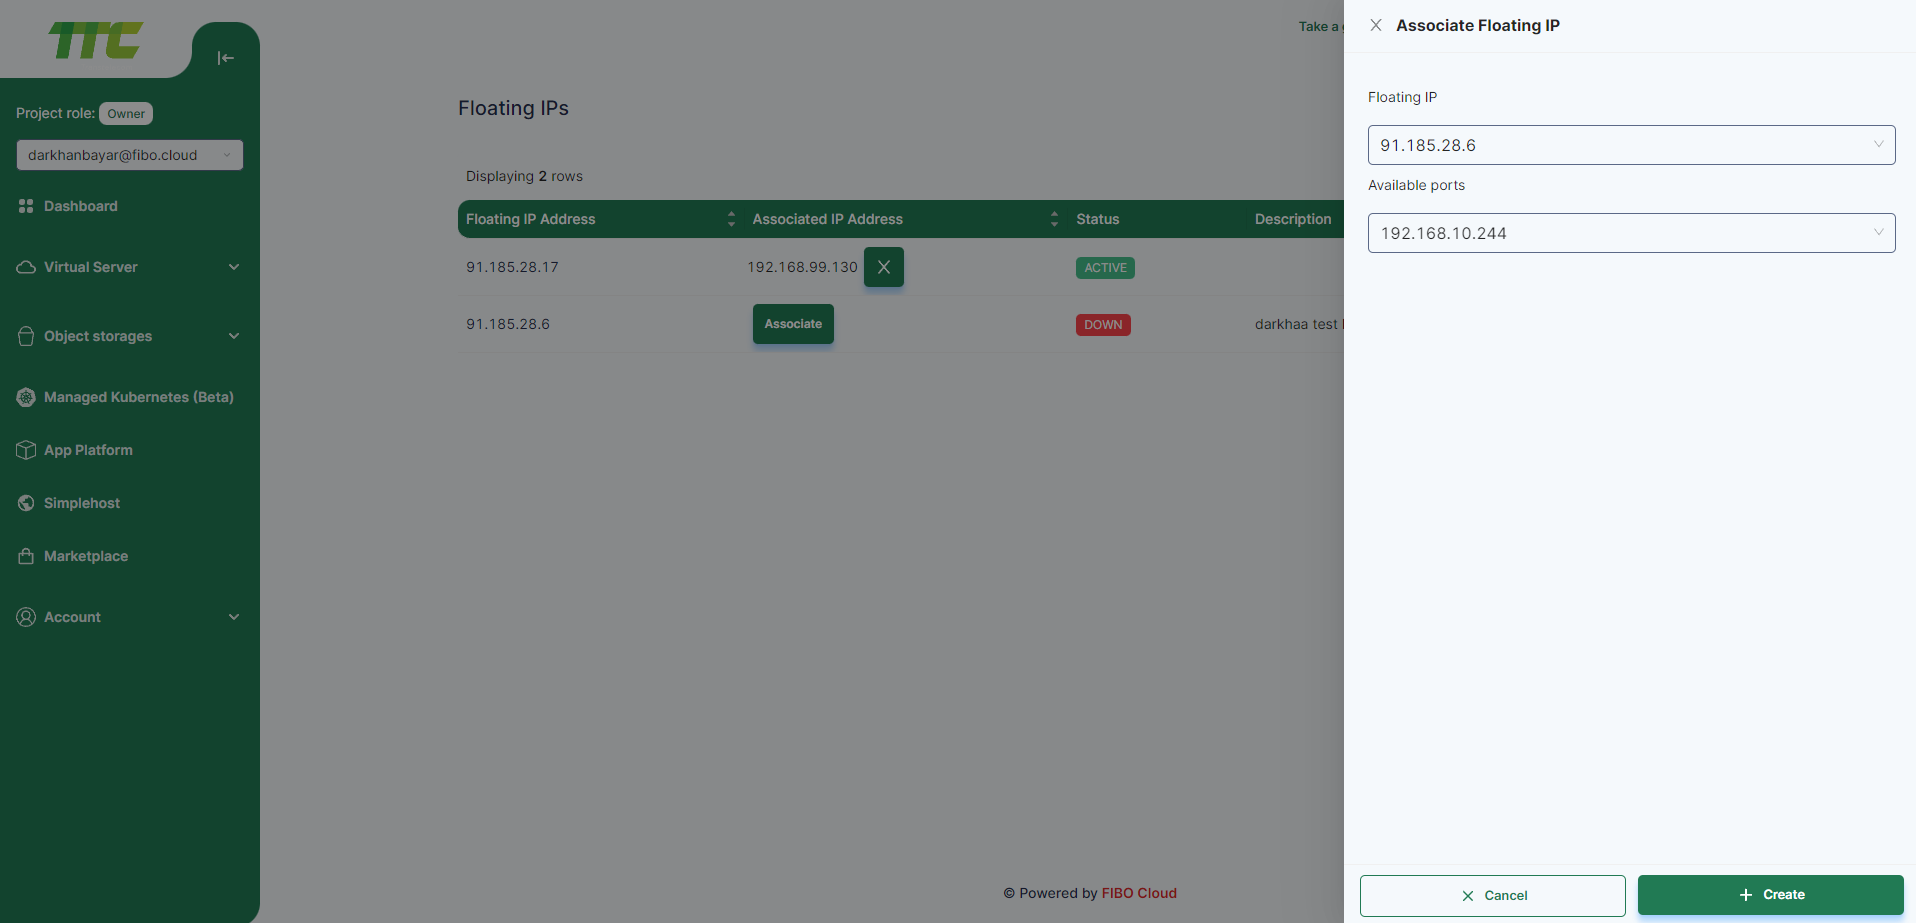
- After connecting the floating ip address, it will look like this.